MAP CONTROLS: Use slider or mousewheel to zoom, and hold down left mouse button
to drag.
KEY: Location markers are coloured from Green meaning exact to Red meaning
gone or unknown (details here)
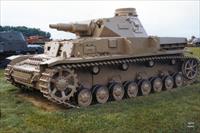
This Ausf D was captured during the war and shipped to the US for testing and evaluation. It has additional armour on the nose, and on the front and both sides of its superstructure. The arrangement of the armour in front of the driver’s position is unusual as it is in two pieces rather than one.
|
July 1983
|
| | | | 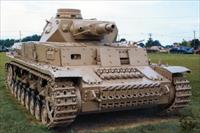 | | | | |
1: The Ausf D at Aberdeen
Taken: 9 July 1983
Contributor: T. Larkum
Photo ID: 80
Added: 28 May 2008
Filename: Scan_PzI...
Views: 389
Select/Has Priority: 1/0
|
|
|
|
| | | | 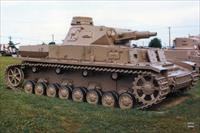 | | | | |
2: Right view
Taken: 9 July 1983
Contributor: T. Larkum
Photo ID: 798
Added: 8 December 2008
Filename: Scan_PzI...
Views: 415
Select/Has Priority: 22/0
|
|
|
|
| | | | 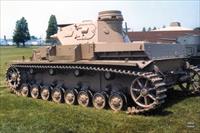 | | | | |
3: Rear left view
Taken: 9 July 1983
Contributor: T. Larkum
Photo ID: 799
Added: 8 December 2008
Filename: Scan_PzI...
Views: 355
Select/Has Priority: 22/0
|
|
|
|
| | | | 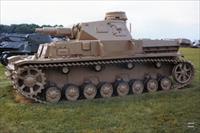 | | | | |
4: Left view
Taken: 9 July 1983
Contributor: T. Larkum
Photo ID: 800
Added: 8 December 2008
Filename: Scan_PzI...
Views: 357
Select/Has Priority: 22/0
|
|
|
|
| | | |  | | | | |
5: Front left view
Taken: 9 July 1983
Contributor: T. Larkum
Photo ID: 801
Added: 8 December 2008
Filename: Scan_PzI...
Views: 364
Select/Has Priority: 22/0
|
| | | |
|
|